To add a role double click the Add Role icon.
Doing this creates a role with the default name
role1. Right clicking a role opens a pop-up
menu with the following options:
' – Cut the role
' – Copy the role
– Open the role editor.
– Open the role editor in a new editor window.
' – Remove the role
– Currently not implemented.
To rename a role, simply click on the role name and you will then be able to edit the text.
All roles that have been defined are listed under
Roles on the left side of the role editor.
Double clicking a role object opens the role editor docked at
the bottom of the screen.
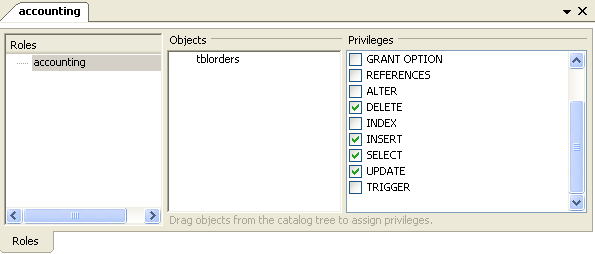
Select the role that you wish to add objects to. You may drag
and drop objects from the Physical Schemata
to the Objects section of the role editor. To
assign privileges to a role select a role from the
Roles section and then select an object in
the Objects section. In the
Privileges section check the rights you wish
to assign to this role. For example, a
web_user role might have only
SELECT privileges and only for database
objects exposed through a web interface. Creating roles can make
the process of assigning rights to new users much easier.